How to Set Up DNS on iPhone
Please note that this guide is for setting up Smart DNS. If you prefer you can alternatively install our VPN app, which will give you access to all the same channels as Smart DNS. Simply connect to any VPN server and you will automatically be able to unblock all the channels supported by Smart DNS. This happens via Unlocator Hybrid.
iOS 12 -> 17

iOS 11
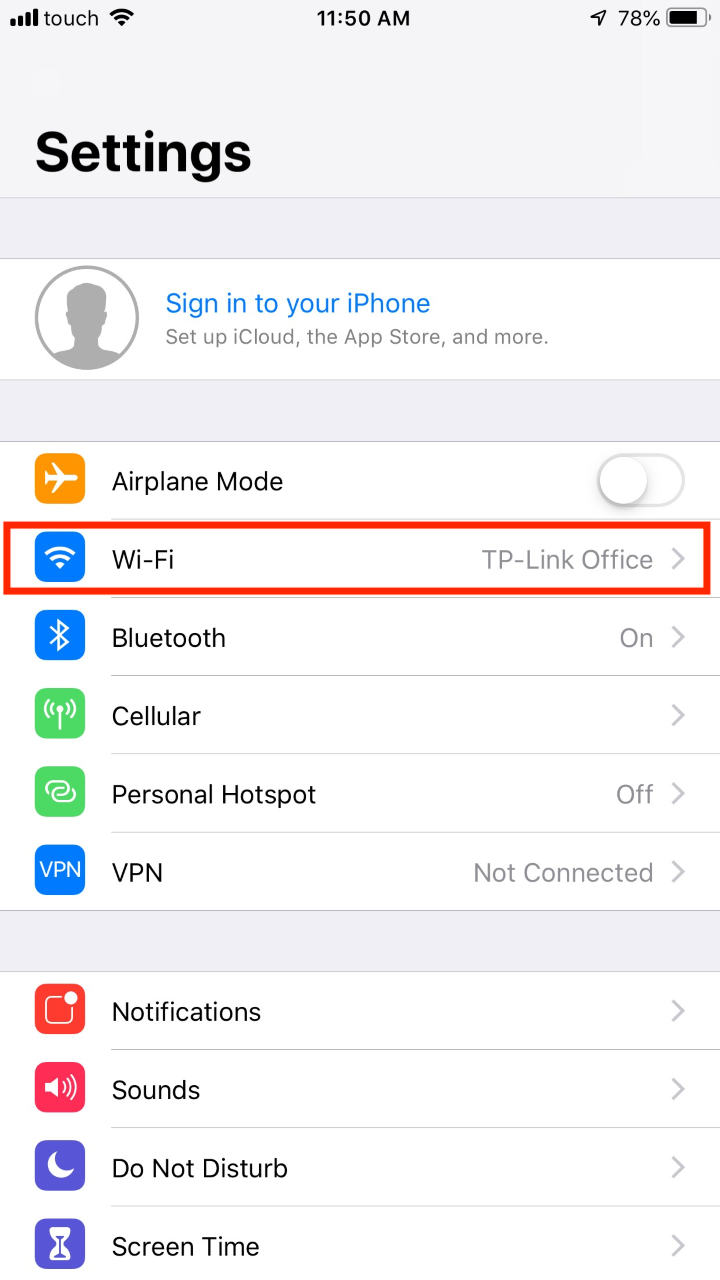
- 1
- Open Settings
- 2
- Click on Wifi
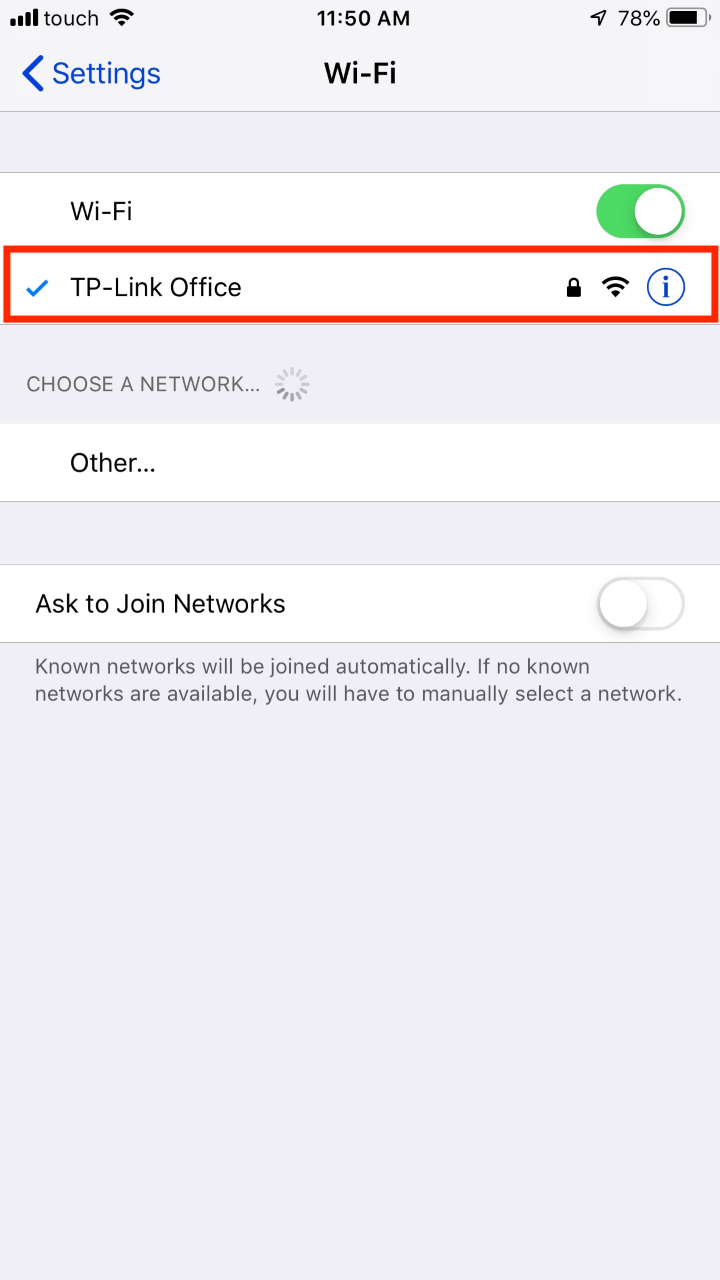
- 3
- Click on your network
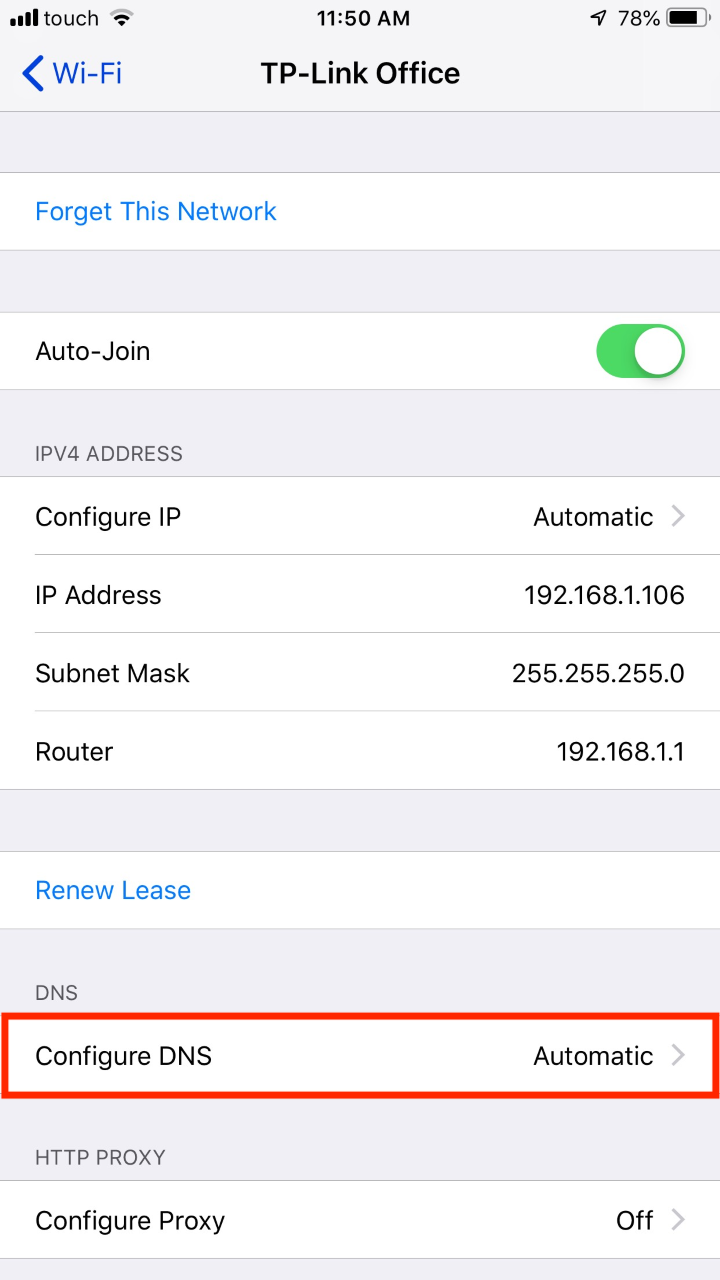
- 4
- Select 'Configure DNS'
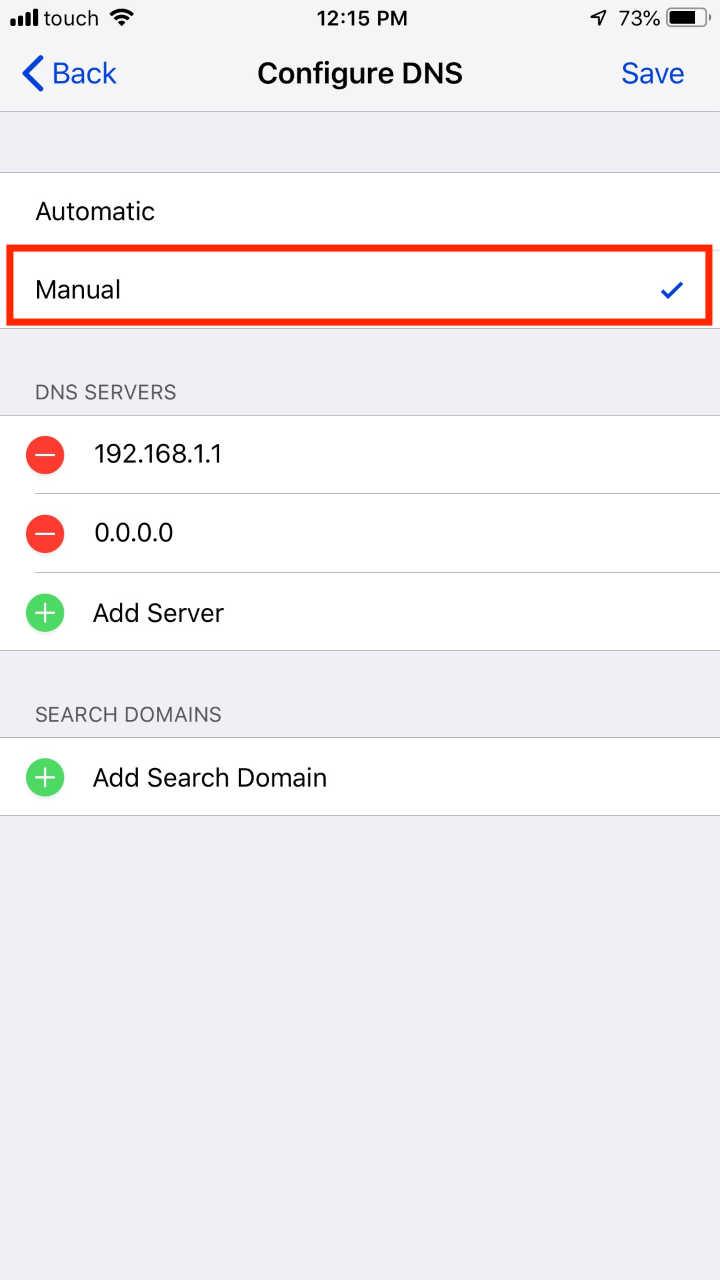
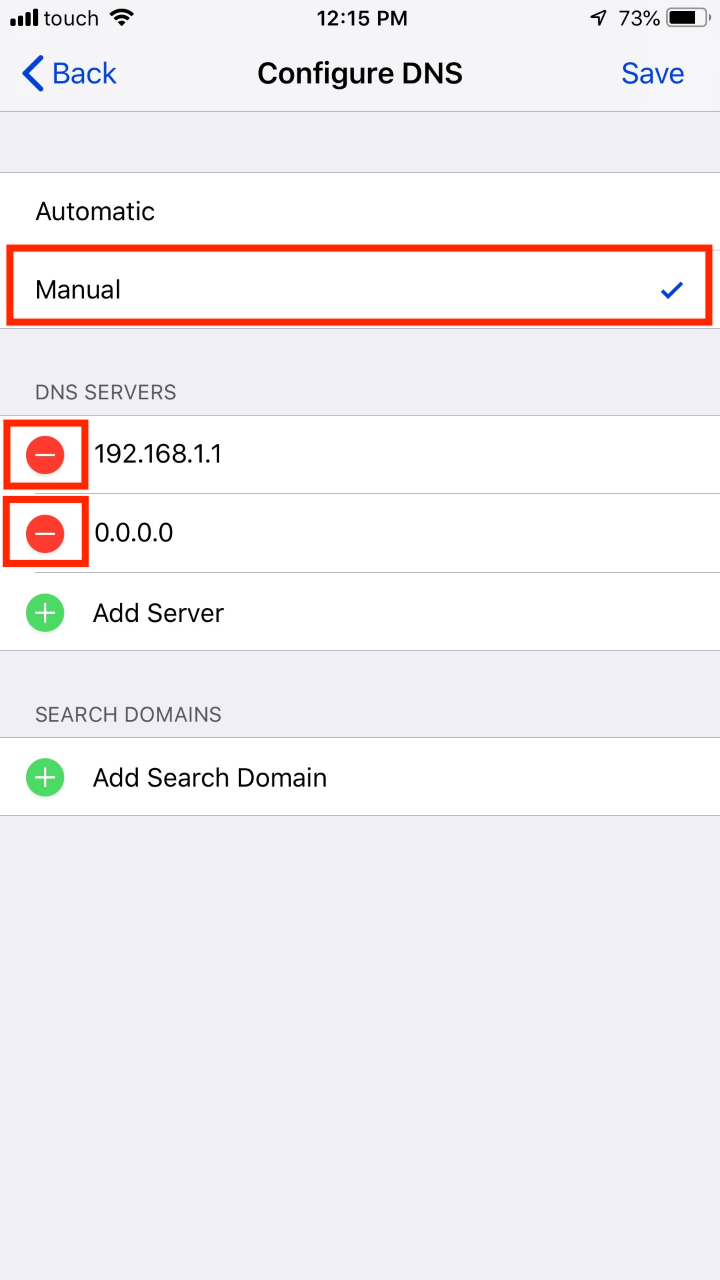
- 5
- Select 'Manual'
- 6
- Remove any DNS servers that may exist
- 7
- Click on Add server and enter 185.37.37.37
- 8
-
Repeat the previous step but this time enter 185.37.39.39
- 9
- Save, then restart your iPhone.
- 1
- First open Settings
- 2
- Select Wi-Fi
- 3
- Press the blue arrow located on the right of the router you are connected to.
- 4
- Under DNS input 185.37.37.37, 185.37.39.39
- 5
- Press Wi-Fi to go back
- 6
- Restart your iPhone
Older versions of iOS
Important
If the app you need is not available in your local app store you need to change to the US app store in order to install it. Please follow this guide to get the US app store. Always log out of the app and restart it when changing location.