How to set up DNS on macOS
Please note that this guide is for setting up Smart DNS. If you prefer you can alternatively install our VPN app, which will give you access to all the same channels as Smart DNS. Simply connect to any VPN server and you will automatically be able to unblock all the channels supported by Smart DNS. This happens via Unlocator Hybrid.
Please see the video below to set up Unlocator Smart DNS or follow the step-by-step instructions.
- 1
- Open up System Preferences
- 2
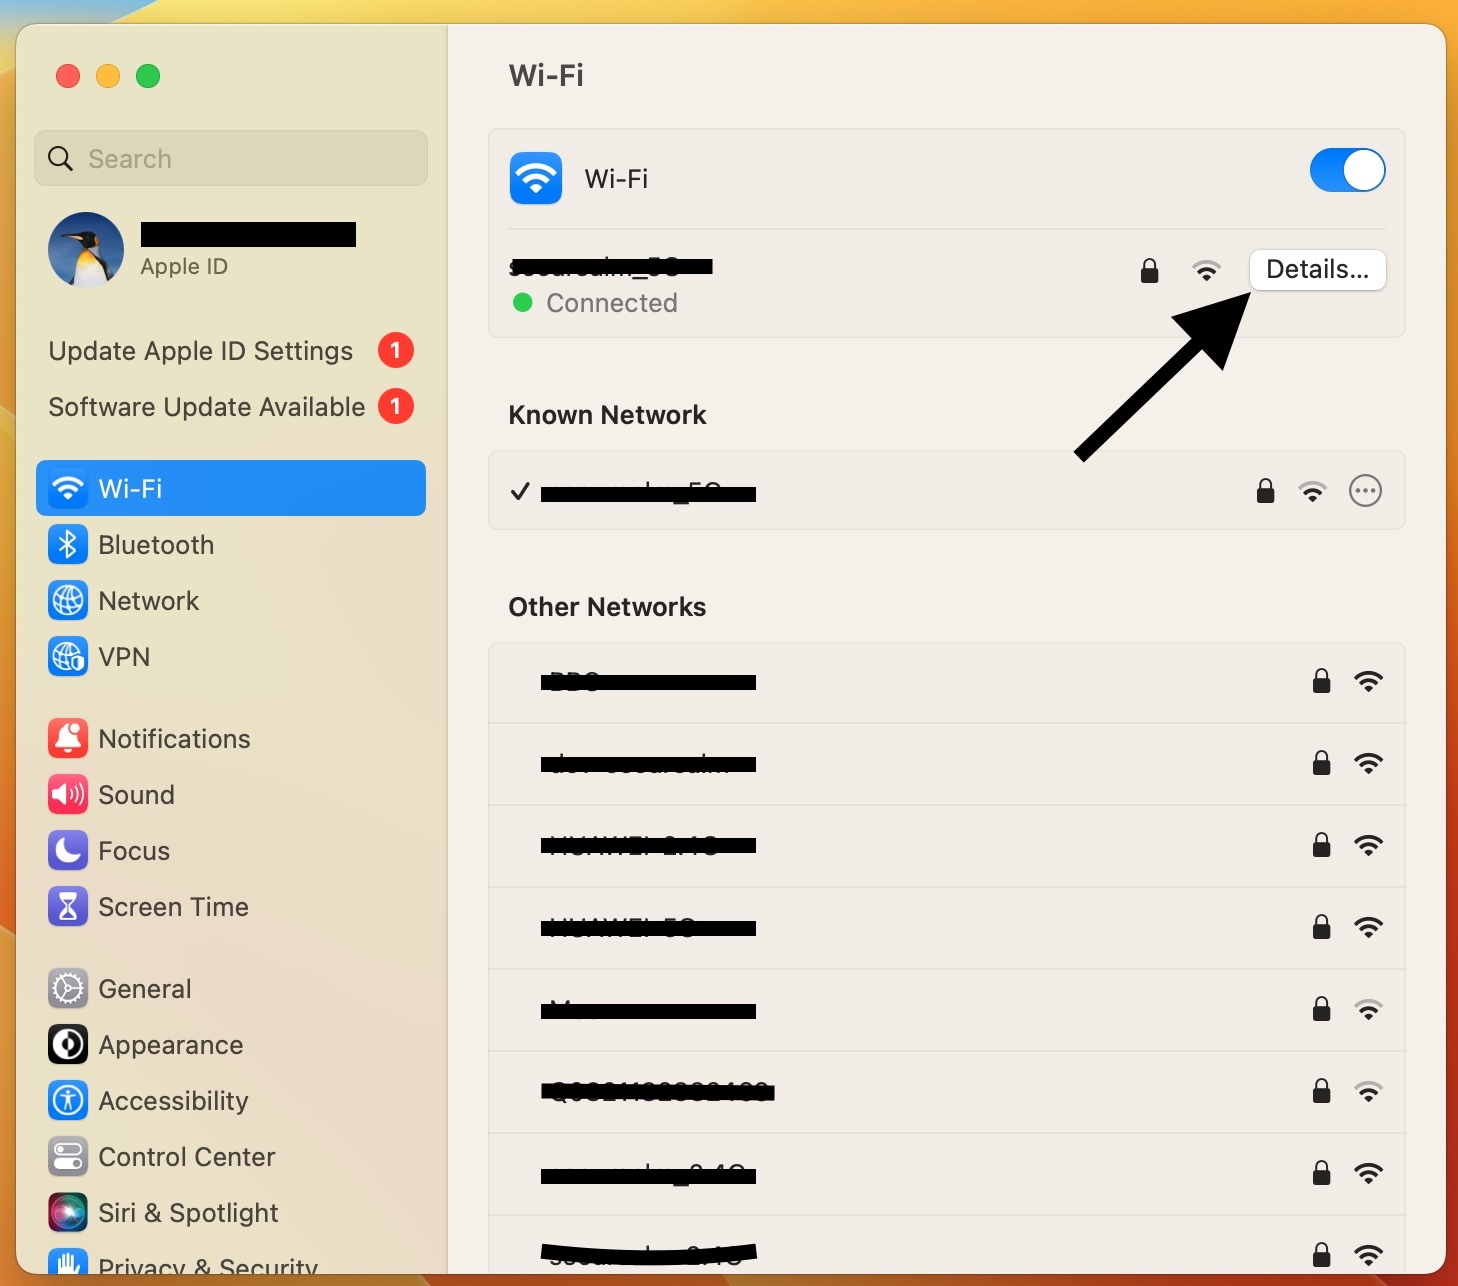
- Then select either Wi-Fi or Ethernet depending on the method you use to connect to the Internet.
- 3
-
Once selected click the Details button

- 4
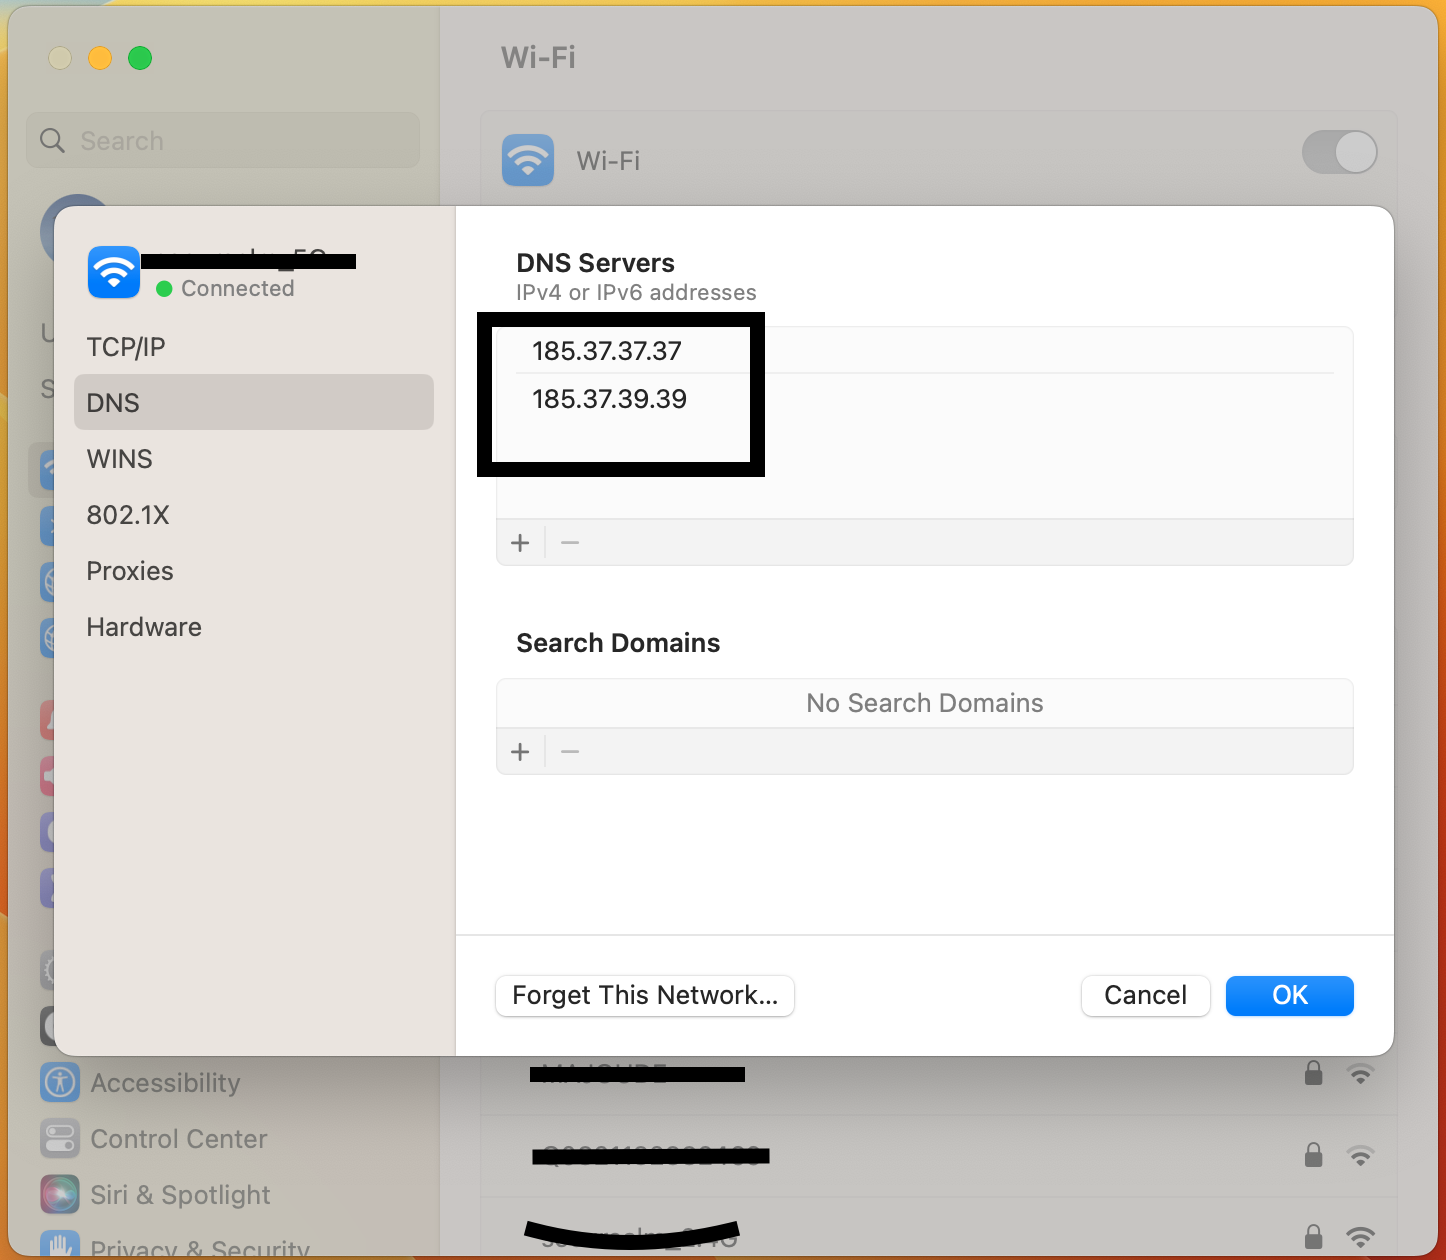
- Then select "DNS"
- 5
- Click the small plus on the lower left-hand side
- 6
-
Add 185.37.37.37 and 185.37.39.39

- 7
- Remove any other DNS address
- 8
- Click OK
- 9
- Then click Apply
- 10
- Restart your computer
- 11
- Log back into your Unlocator account here
- 12
- Verify that the DNS check now completes with a green checkmark
