
How to Set Up Unlocator VPN "L2TP" Manually on Windows 10
- 1
-
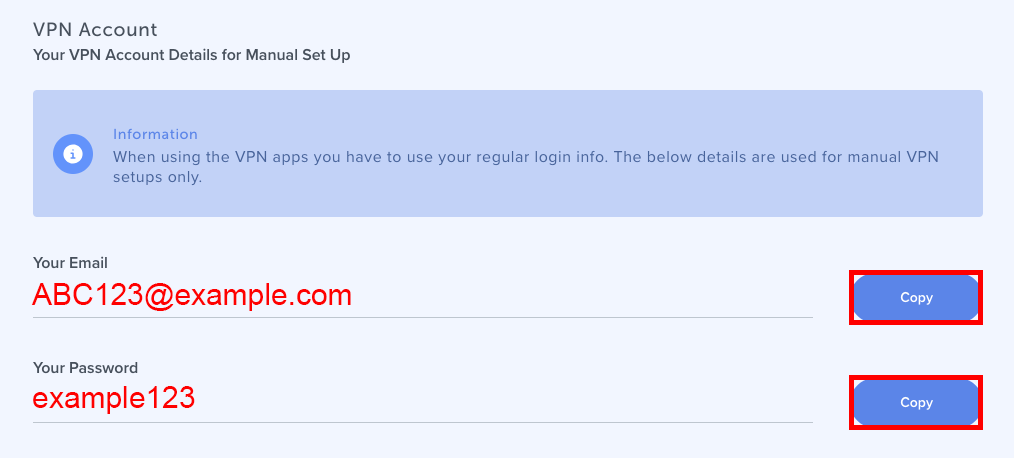
First, find your Unlocator VPN account credentials
In order to set up a manual VPN connection, you need to use a server address, and your username and password found in your Unlocator account under the VPN tab.
You can locate this page by following these steps:- Go to My Account
- Locate the VPN tab in the bottom-left corner of the page
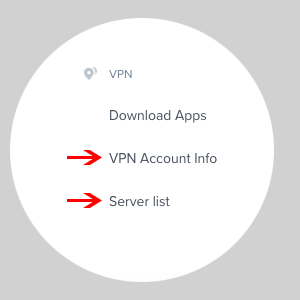
-
To view your Email and Password: Choose VPN Account Info
-
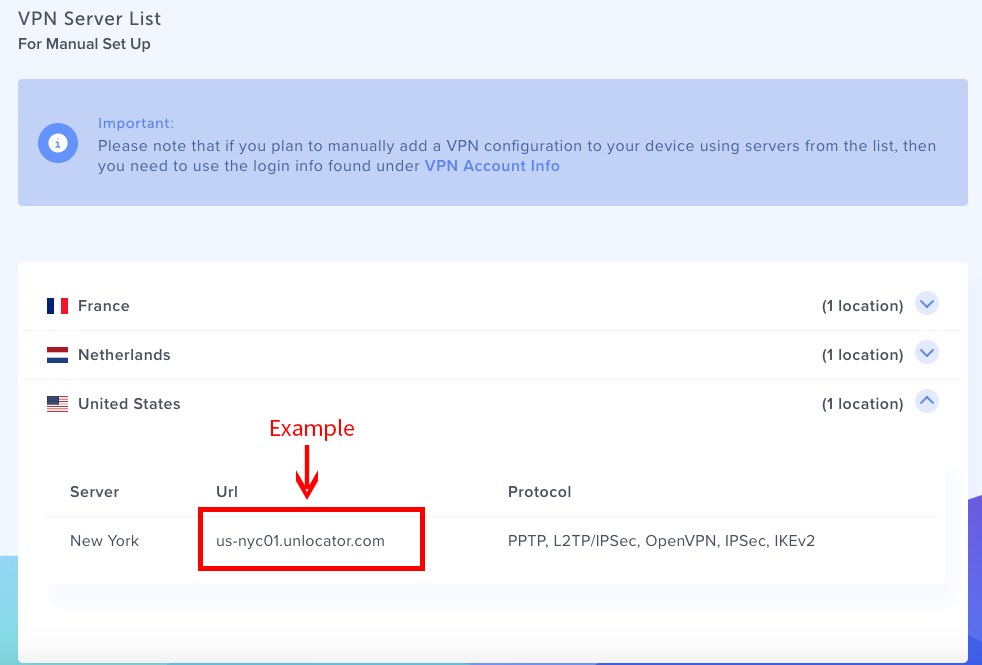
To view the server addresses: Choose Servers List
- 2
-
Click on the Lan/Wifi icon in the bottom-right
To add a new VPN connection, click on the Internet access icon in your system tray. Then, from the pop-up menu, click Network settings
- 3
-
Click on VPN then click on Add a VPN connection

- 4
-
In the Add a VPN Connection menu, use the following settings:
- VPN provider: Windows (built-in)
- Connection name: Enter a name for your VPN connection
- Server name or address: Choose a server from our servers list See step 1
- VPN type: Select Layer 2 Tunneling Protocol with IPsec (L2T/IPsec) or L2TP/IPsec with pre-shared key from the VPN type drop-down menu
- Use Unlocator as your pr-shared key if you chose to set up the L2TP/IPsec with pre-shared key VPN protocol.
- Type of sign-in info: User name and password
- User name: Email is shown in your VPN account info. See step 1
- Password: The password is shown in your VPN account info. See step 1

- 5
-
Click on Connect to connect to your VPN:
You will now see your new VPN connection in the Network & Internet settings panel. To connect to the VPN server, click the name of the connection, then click Connect.
- 6
-
VPN Status:
You can now see that you are connected to the VPN.
 You can disconnect from the VPN by clicking on Disconnect.


You might want to keep these pages open so you could easily copy the info to be used in step 4.


 You can disconnect from the VPN by clicking on Disconnect.