
How to Set Up DNS on Android
This guide is for setting up Smart DNS. If you prefer you can alternatively install our VPN app, which will give you access to all the same channels as Smart DNS. Simply connect to any VPN server and you will automatically be able to unblock all the channels supported by Smart DNS. This happens via Unlocator Hybrid.
There are a lot of implementations of Android in the market. That is why each device might have a different way of changing DNS settings. Below are guides for standard setup on Android 13.x, 10.x, 9.x, 8.x, 5.x, 4.x, and 2.x
Navigate to the version of your device using the following links:
Android 13+.x
Android 10.x
Android 9.x
Android 8.x
Android 5.x
Android 4.x
Android 2.x
- 1
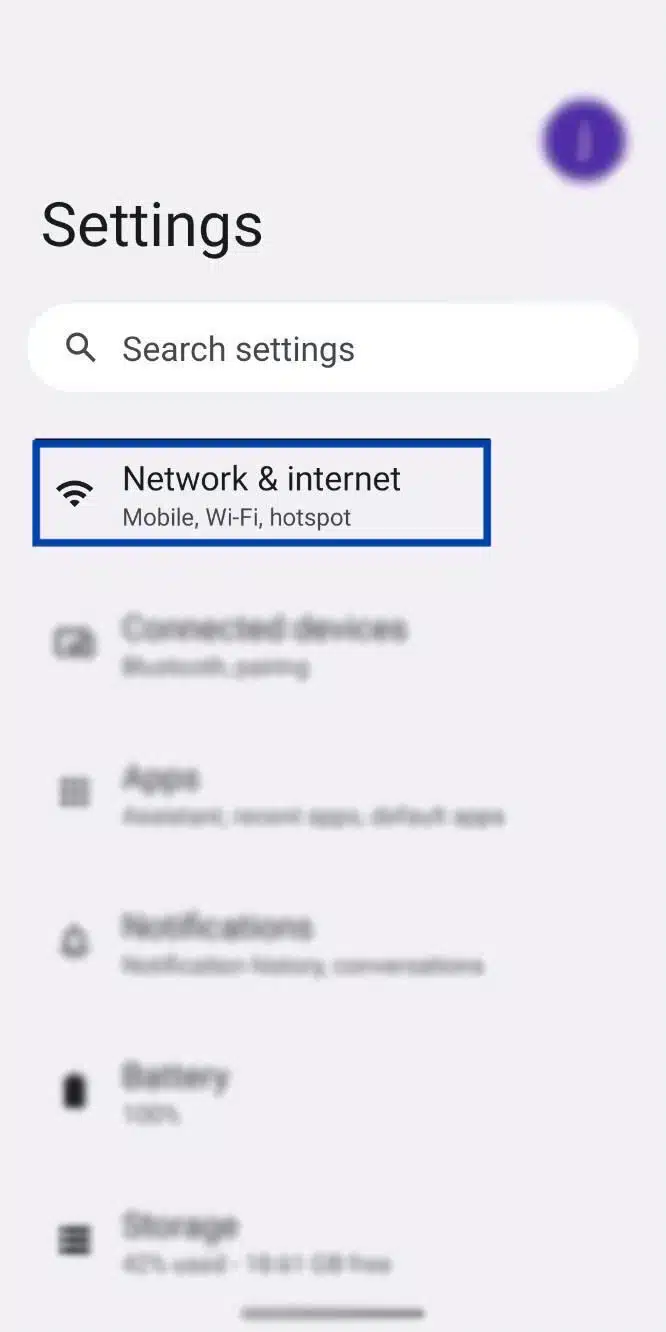
- Find Settings.
- 2
- Tap on "Network & Internet"
-
- 3
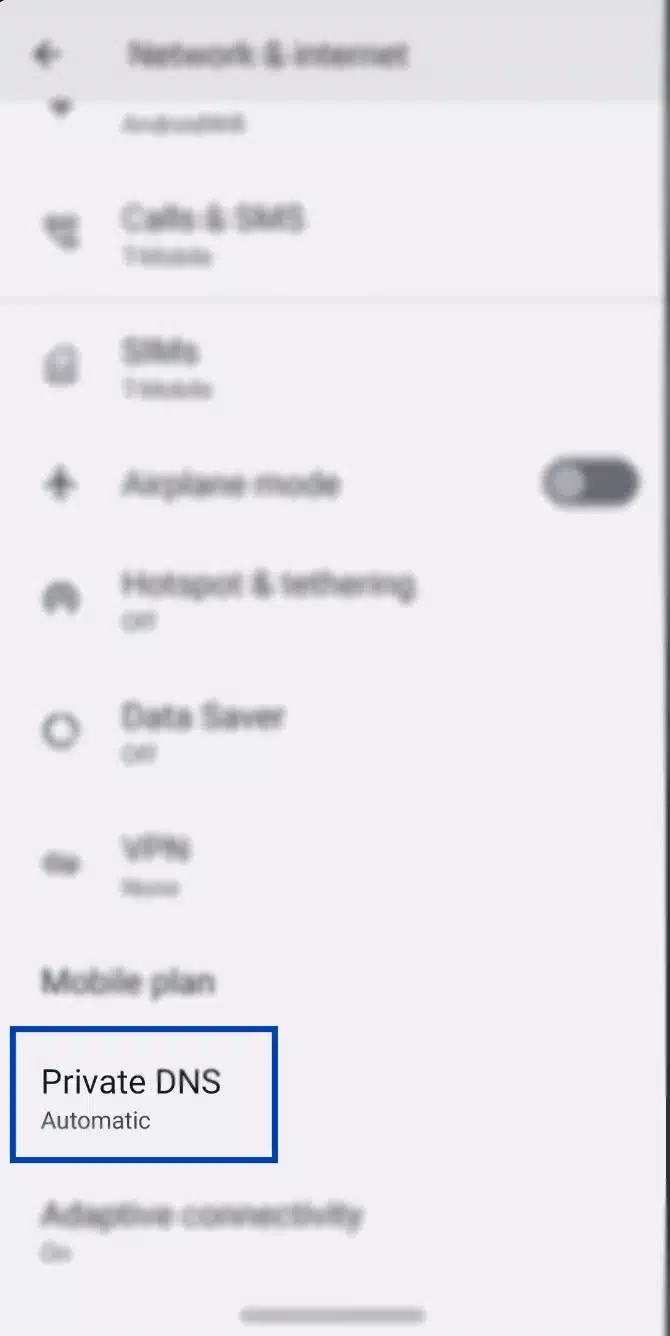
- Scroll down until you see "Private DNS"
-
- 4
- Make sure "Private DNS" is turned Off. Otherwise, it will override the DNS settings you are using.
- 5
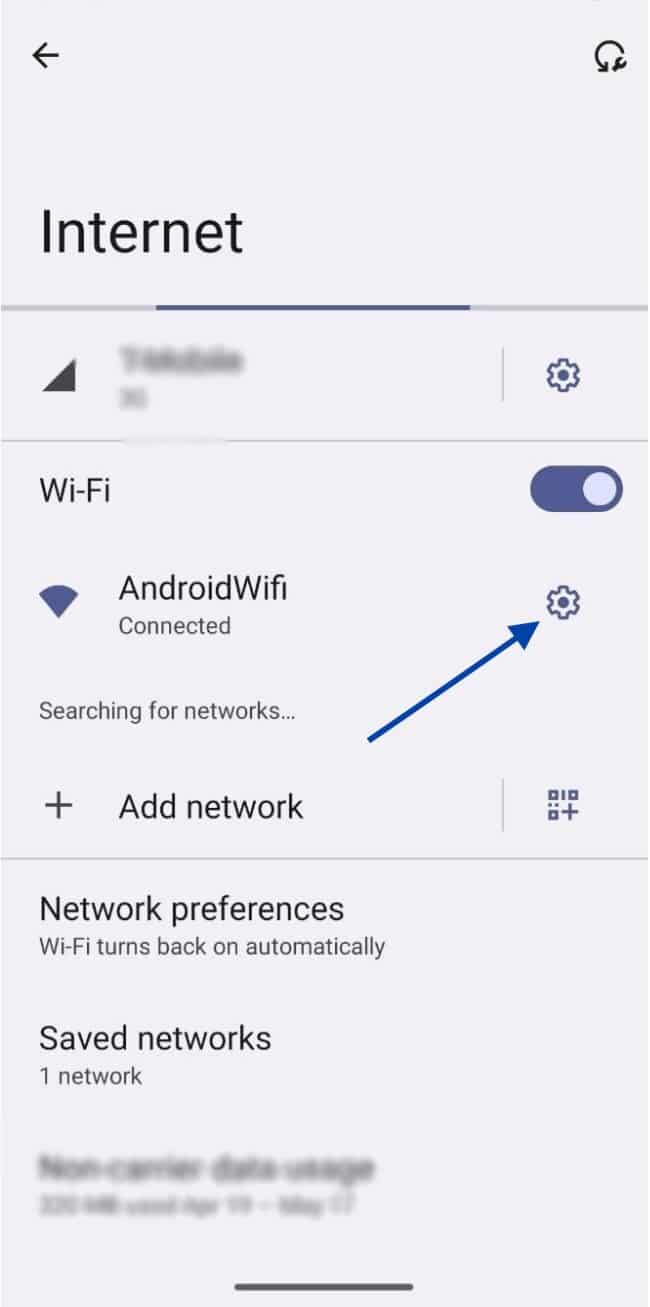
- Now, scroll back up and tap on "Internet"
- 6
- From there, select the wheel next to the WiFi network you're connected to
-
- 7
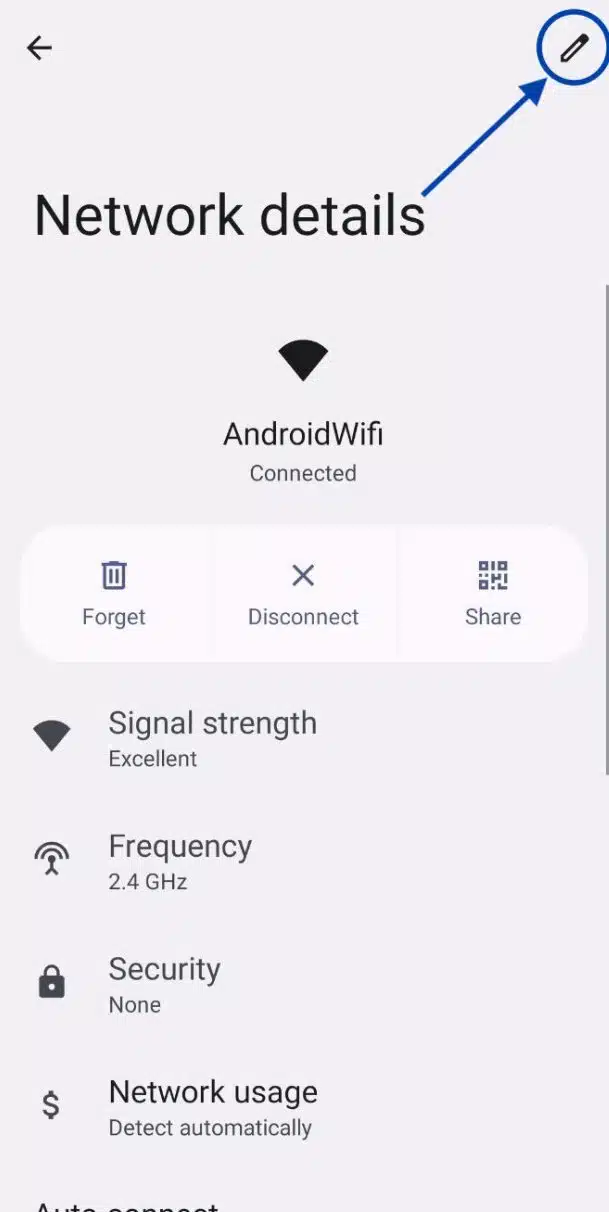
- Tap the edit button you can find on the top right corner of your screen
-
- 8
- Select "Advanced options" and under "IP settings" choose "Static"
- 9
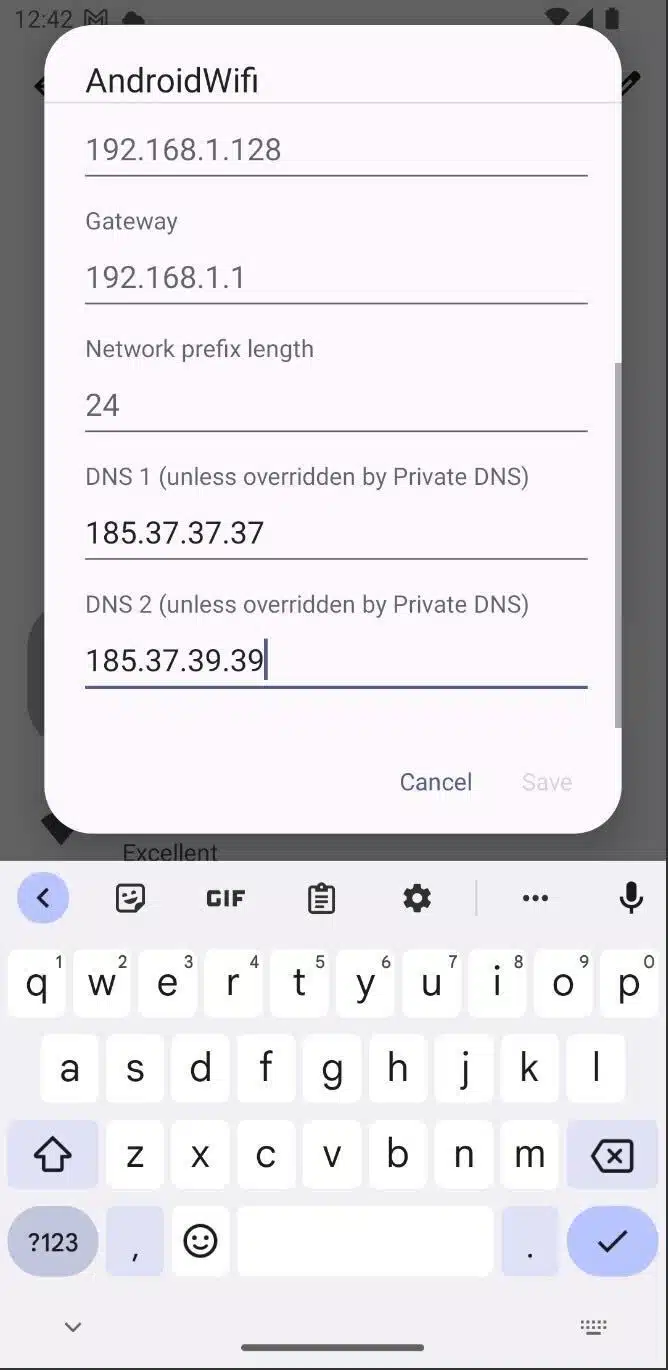
- You will need to enter the following:
- .Keep the IP address and Gateway as the default
- .Fill in the DNS 1 and 2 fields as 185.37.37.37 and 185.37.39.39 respectively
-
- 10
- Click Save
- 11
- Restart your mobile.
Changing DNS on Android 13+.x
- 1
- Find Settings.
- 2
-
Select Connections

- 3
-
Tap on Wifi.

- 4
-
Select your Wifi network's Settings.

- 5
-
Tap on Advanced.

- 6
-
For IP Settings, tap on DHCP and choose Static

- 7
-
Input the Unlocator DNS servers, DNS 1: 185.37.37.37 & DNS 2: 185.37.39.39. (Please leave the IP address and Gateway with no edit)

- 8
- Tap Save.
- 9
- Restart your device.
- 1
- Find Settings.
- 2
-
Select Network and Internet

- 3
-
Tap on Wifi.

- 4
-
Select your Wifi network.

- 5
-
Tap on Advanced.

- 6
-
For IP Settings, choose Static

- 7
-
Tap on the edit icon in the top-right corner.

- 8
-
Input the Unlocator DNS servers, DNS 1: 185.37.37.37 & DNS 2: 185.37.39.39

- 9
- Tap Save.
- 10
-
Restart your device.
- 1
- Find Settings.
- 2
-
Select Network & Internet.

- 3
-
Select WiFi.

- 4
-
Tap and hold the network you want to connect to until a box appears.

- 5
- Select Modify Network.
- 6
-
Tap Advanced Options.

- 7
-
For IP Settings choose Static.

- 8
- Manually enter your IP address, Gateway, Subnet/Network Prefix Length, using the same values you see in gray. Otherwise, you will not be able to save your settings.
- 9
-
Input the Unlocator DNS servers, DNS 1: 185.37.37.37& DNS 2: 185.37.39.39

- 10
- Tap Save.
- 11
- Restart your device.
- 1
- Find Settings.
- 2
- Select Wi-Fi settings.
- 3
- Tap and hold the network you want to connect to until a box appears.
- 4
- Select Modify Network.
- 5
- Tap the checkbox next to Show Advanced Options.
- 6
- Manually enter your IP address, Gateway, Subnet/Network Prefix Length, using the same values you see in gray. Otherwise, you will not be able to save your settings.
- 7
- Input the Unlocator DNS servers: 185.37.37.37& Secondary Server 185.37.39.39
- 8
- Tap Save.
- 9
- Restart your device
- 1
- Find Settings
- 2
- Choose Wi-Fiby actually pressing Wi-F
- 3
- Press and hold your network and a window will open up
- 4
- Choose Modify Network
- 5
- Check the Show advanced options checkbox at the bottom of the screen
- 6
- Set IP settingsto Static
- 7
- Simply keep your IP address, Gateway and Network prefix length the same
- 8
- Input the Unlocator DNS servers: 185.37.37.37& Secondary Server 185.37.39.39
- 9
- Press Save
- 10
- Restart your device
- 1
- Find Settings
- 2
- Select Wireless and Networks
- 3
- Then choose Wi-Fi Settings
- 4
- In the Menu go to Advanced
- 5
- Select Use Static IP
- 6
- Copy or write down your current IP address, which you can see directly above the IP address field
- 7
- Set your Gatewayto the IP of your router. Normally the router address is the same as your current IP but with a 1 at the end. As an example, if your IP is 10.0.1.3 then your router is 10.0.1.1
- 8
- Set the netmask to 255.255.255.0
- 9
- Input the Unlocator DNS servers: 185.37.37.37 Secondary Server 185.37.39.39
- 10
- Go to Menu and Save
- 11
- Restart your device
-


